Have you ever thought about how cool it would be to design your own lighter? Custom printed lighters let you showcase your creativity or promote your brand in a fun way. With printing lighter making, you can turn plain lighters into eye-catching pieces. It’s easier than you think, and the results are amazing!
Key Takeaways
- Collect important tools like a printer, design app, and cleaning items to begin your lighter project.
- Pick the best lighter type; plastic is easy for starters, while metal works for detailed designs.
- Make your design simple and check it fits the lighter for good results.
Tools and Materials for Printing Lighter Making
Before you dive into printing lighter making, you’ll need the right tools and materials. Let’s break it down step by step so you’re fully prepared.
Essential tools and equipment
To get started, you’ll need a few key tools. First, a printing machine is a must. Depending on your design needs, you can choose between a pad printing machine or a UV printer. You’ll also need a design software like Adobe Illustrator or CorelDRAW to create or adjust your artwork. Don’t forget a clean workspace with good lighting to ensure precision during the process.
Other essentials include a jig or fixture to hold the lighter in place while printing. This keeps your design aligned and prevents smudging. Lastly, have some cleaning supplies handy, like alcohol wipes, to clean the lighter’s surface before printing.
Types of lighters suitable for customization
Not all lighters are created equal when it comes to customization. Plastic lighters, like disposable ones, are popular because they’re affordable and easy to print on. Metal lighters, such as Zippo-style lighters, offer a premium feel and are perfect for intricate designs. Make sure the lighter has a smooth surface for the best results.
If you’re unsure, start with a simple plastic lighter. It’s beginner-friendly and great for practicing your technique.
Printing materials and supplies
You’ll need a few supplies to bring your designs to life. Ink is the most important. For pad printing, use solvent-based ink, while UV printers require UV-curable ink for vibrant and durable prints. You’ll also need transfer pads or printing plates to transfer your design onto the lighter.
Don’t forget to stock up on test lighters for practice runs. This helps you fine-tune your process before working on the final product. Having extra supplies ensures you’re ready for any mistakes or adjustments.
Pro Tip: Always test your materials on a sample lighter to avoid wasting ink or damaging your equipment.
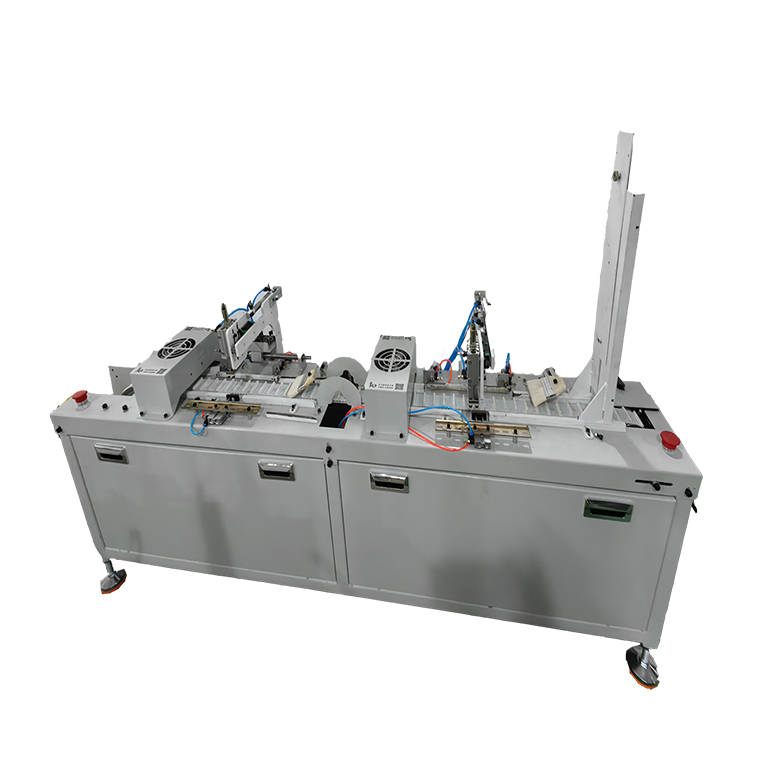
Choosing the Right Printing Machine for Lighters
When it comes to printing lighter making, choosing the right machine is crucial. The type of machine you pick will directly impact the quality of your designs and how easy the process feels. Let’s explore your options.
Pad printing machines and their features
Pad printing machines are a popular choice for customizing lighters. They use a silicone pad to transfer ink from an etched plate onto the lighter’s surface. This method works great for curved or uneven surfaces, making it ideal for most lighter shapes.
These machines are compact and relatively easy to operate. You’ll love how precise they are, especially for small or detailed designs. Plus, they’re cost-effective, which makes them perfect if you’re just starting out. However, keep in mind that pad printing is better suited for single-color or simple designs.
Tip: If you’re working with bulk orders, pad printing machines can save you time and effort.
UV printing machines for vibrant designs
If you’re aiming for bold, colorful designs, UV printing machines are your best bet. These machines use ultraviolet light to cure the ink instantly, resulting in vibrant and durable prints. They’re perfect for intricate, multi-color designs that really pop.
UV printers also work well on both plastic and metal lighters. The process is straightforward, and you can print directly onto the lighter without needing transfer pads. While they’re more expensive than pad printers, the quality and versatility they offer are worth it.
Factors to consider when selecting a machine
Before you decide, think about your needs. Are you printing simple logos or detailed artwork? How many lighters do you plan to customize? If you’re on a budget, a pad printer might be the way to go. But if you want high-quality, full-color designs, invest in a UV printer.
Also, consider the materials you’ll be working with. Some machines handle plastic better, while others excel with metal. Don’t forget to check the machine’s size and compatibility with your workspace.
Pro Tip: Always test a few designs on your chosen machine before committing to large-scale production.
Preparing the Design for Lighter Printing
Getting your design ready is one of the most exciting parts of printing lighter making. This is where your creativity shines! Let’s break it down step by step so you can create a design that looks amazing on your lighters.
Creating or sourcing a custom design
Start by deciding what you want on your lighter. Do you have a logo, a favorite quote, or a unique pattern in mind? If you’re artistic, you can create your own design using software like Adobe Illustrator or Canva. These tools make it easy to draw, color, and customize your artwork.
Not into designing? No problem! You can find pre-made designs online or hire a freelance designer to bring your ideas to life. Just make sure the design is high-resolution. Blurry images won’t look good when printed.
Tip: Keep your design simple. Too many details can get lost on the small surface of a lighter.
Adjusting the design to fit the lighter’s surface
Once you have your design, it’s time to adjust it. Lighters have a small, curved surface, so you’ll need to resize and reshape your artwork to fit perfectly. Use your design software to scale the image down and align it with the lighter’s dimensions.
Test the fit by printing a paper version of your design. Wrap it around the lighter to see how it looks. This step helps you spot any issues before you start printing.
Tips for achieving high-quality designs
Want your design to stand out? Use bold colors and clear lines. Avoid tiny text or overly intricate details. If you’re using a UV printer, experiment with gradients and vibrant shades to make your design pop.
Always save your design in the correct file format, like PNG or vector files, to maintain quality. And don’t forget to double-check your work. A little extra effort here ensures your final product looks professional.
Pro Tip: Practice on a test lighter first. It’s a great way to see how your design transfers and make adjustments if needed.
Step-by-Step Printing Process
Setting up the printing machine
Before you start, make sure your printing machine is ready to go. Place it on a stable surface in your workspace. Check that all parts are clean and functioning properly. If you’re using a pad printer, install the printing plate and silicone pad. For UV printers, load the ink cartridges and ensure the curing light is working.
Next, adjust the machine settings. Set the pressure, speed, and ink flow according to the type of lighter and design you’re working with. Refer to the machine’s manual for guidance. Don’t skip this step—it’s key to getting a smooth and professional print.
Tip: Run a quick test print on a scrap material to confirm everything is set up correctly.
Aligning the design with the lighter
Now it’s time to align your design. Place the lighter in the jig or fixture to keep it steady. Use your machine’s alignment tools to position the design exactly where you want it on the lighter. Double-check the placement to avoid crooked or off-center prints.
If your machine has a preview feature, use it to see how the design will look. This step ensures your final product matches your vision.
Printing techniques for best results
With everything in place, you’re ready to print! For pad printing, press the silicone pad onto the inked plate, then transfer it onto the lighter. Apply even pressure to avoid smudges. If you’re using a UV printer, let the machine handle the process while the curing light sets the ink instantly.
After printing, inspect the lighter for any imperfections. If needed, clean up small errors with a cotton swab dipped in alcohol. Practice makes perfect, so don’t worry if your first few tries aren’t flawless.
Pro Tip: Work slowly and carefully. Rushing can lead to mistakes that waste time and materials.
Post-Printing Tips for Quality and Durability
Once your design is printed, you’re almost done! But to make sure your custom lighters look great and last a long time, there are a few final steps you shouldn’t skip. Let’s dive into the finishing touches.
Conducting quality control checks
Before you call it a day, inspect each lighter carefully. Look for smudges, uneven prints, or missing details. Hold the lighter under good lighting to spot any imperfections. If you find small errors, clean them up with a cotton swab and a bit of rubbing alcohol.
Create a checklist to make this process easier. For example, check for alignment, color accuracy, and overall print quality. If you’re working on a batch, test a few random pieces to ensure consistency.
Tip: Take your time with quality control. A flawless finish will impress your customers or friends!
Curing the printed design for longevity
Curing is a crucial step that locks in your design. If you used a UV printer, the curing process happens instantly during printing. For pad printing, you’ll need to let the ink dry completely. Place the lighters in a dust-free area and allow them to air dry for at least 24 hours.
For extra durability, consider using a heat gun or a curing oven (if your materials allow it). This step ensures the ink bonds well to the lighter’s surface.
Ensuring durability of the final product
To make your design last, apply a protective coating. A clear sealant spray works wonders for both plastic and metal lighters. It adds a layer of protection against scratches and fading.
Also, remind users to handle the lighters with care. While your design is durable, rough handling can still cause wear over time.
Pro Tip: Store your finished lighters in a cool, dry place to keep them looking fresh and vibrant.
Custom printed lighters let you express creativity or promote your brand in a unique way. By following these steps, you’ll create high-quality designs with ease. Don’t hesitate to experiment and try new ideas.
Tip: Start small, practice often, and watch your skills grow. Your custom lighters will stand out!
FAQ
What type of ink works best for lighter printing?
For pad printing, solvent-based ink works great. UV printers need UV-curable ink for vibrant, durable designs. Always test your ink on a sample lighter first.
Can I print on curved or uneven lighter surfaces?
Yes! Pad printing machines are perfect for curved or uneven surfaces. They use a silicone pad that adapts to the lighter’s shape, ensuring a smooth design transfer.
How do I fix smudges or mistakes during printing?
Use a cotton swab dipped in rubbing alcohol to clean up smudges. Work gently to avoid damaging the design. Practice helps reduce mistakes over time. 😊